Today we are going to implement "Sign in with Phone Number" using Digits.
I'm using Android Studio for development. So first we need to download and install Fabric plugin.
Go to https://fabric.io and create account. After that you need to download Fabric plugin.

Once you download and install plugin, you will see Fabric plugin icon in Android Studio.
After this you need to add some permissions in AndroidManifest.xml


I'm using Android Studio for development. So first we need to download and install Fabric plugin.
Go to https://fabric.io and create account. After that you need to download Fabric plugin.

Once you download and install plugin, you will see Fabric plugin icon in Android Studio.

1. Now create a sample project with one activity.
2. Click on that Fabric plugin button and you will see login page.
3. Enter username and password and login to Fabric.It will detect if any of it's kit installed in project or not.
4. Then click on install button of Digits Kit. Apply the changes in your project.
After that it will add some data to your project as well as in AndroidManifest.
That's it you are successfully integrate Digits kit in your Android project.
Here is the activity_main.xml
<LinearLayout xmlns:android="http://schemas.android.com/apk/res/android"    xmlns:tools="http://schemas.android.com/tools"    android:layout_width="match_parent"    android:layout_height="match_parent"    android:paddingBottom="@dimen/activity_vertical_margin"    android:paddingLeft="@dimen/activity_horizontal_margin"    android:paddingRight="@dimen/activity_horizontal_margin"    android:paddingTop="@dimen/activity_vertical_margin"    android:orientation="vertical"    android:gravity="center"    tools:context=".MainActivity">

    <com.digits.sdk.android.DigitsAuthButton        android:id="@+id/auth_button"        android:layout_width="match_parent"        android:layout_height="wrap_content"        android:text="Click"/>

</LinearLayout>
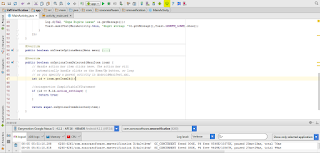
MainActivity.java
public class MainActivity extends AppCompatActivity {

    DigitsAuthButton click;
    private AuthCallback authCallback;
    private static final String TAG = "MainActivity";
    // Note: Your consumer key and secret should be obfuscated in your source code before shipping.    private static final String TWITTER_KEY = "Your Twitter Key";
    private static final String TWITTER_SECRET = "Your Twitter Secret Key";


    @Override    protected void onCreate(Bundle savedInstanceState) {
        super.onCreate(savedInstanceState);
        TwitterAuthConfig authConfig = new TwitterAuthConfig(TWITTER_KEY, TWITTER_SECRET);
        Fabric.with(this, new TwitterCore(authConfig), new Digits());
        setContentView(R.layout.activity_main);

        click = (DigitsAuthButton) findViewById(R.id.auth_button);
        click.setCallback(new AuthCallback() {
            @Override            public void success(DigitsSession digitsSession, String s) {
                Log.d(TAG, "Digit string: "+s.toString());
                Log.d(TAG, "Digit session: "+digitsSession.getAuthToken().toString());
                Toast.makeText(MainActivity.this, "digit string: "+s.toString(),Toast.LENGTH_LONG).show();
            }

            @Override            public void failure(DigitsException e) {
                Log.d(TAG, "Oops Digits issue" +e.getMessage());
                Toast.makeText(MainActivity.this, "digit string: "+e.getMessage(),Toast.LENGTH_LONG).show();
            }
        });
    }

    @Override    public boolean onCreateOptionsMenu(Menu menu) {
        // Inflate the menu; this adds items to the action bar if it is present.        getMenuInflater().inflate(R.menu.menu_main, menu);
        return true;
    }

    @Override    public boolean onOptionsItemSelected(MenuItem item) {
        // Handle action bar item clicks here. The action bar will        // automatically handle clicks on the Home/Up button, so long        // as you specify a parent activity in AndroidManifest.xml.        int id = item.getItemId();

        //noinspection SimplifiableIfStatement        if (id == R.id.action_settings) {
            return true;
        }

        return super.onOptionsItemSelected(item);
    }

}
After this you need to add some permissions in AndroidManifest.xml
<uses-permission android:name="android.permission.INTERNET" />
if you want to allow Digits to prefill the phone number then you need to add below permissions.
<uses-permission android:name="android.permission.READ_PHONE_STATE"/><uses-permission android:name="android.permission.RECEIVE_SMS"/>
And this sample project will run only on real devices.
Screenshots:


Comments
Post a Comment